Weights in a Backpack 🎒 (Rucking)
What is "Weights in a Backpack" Training?
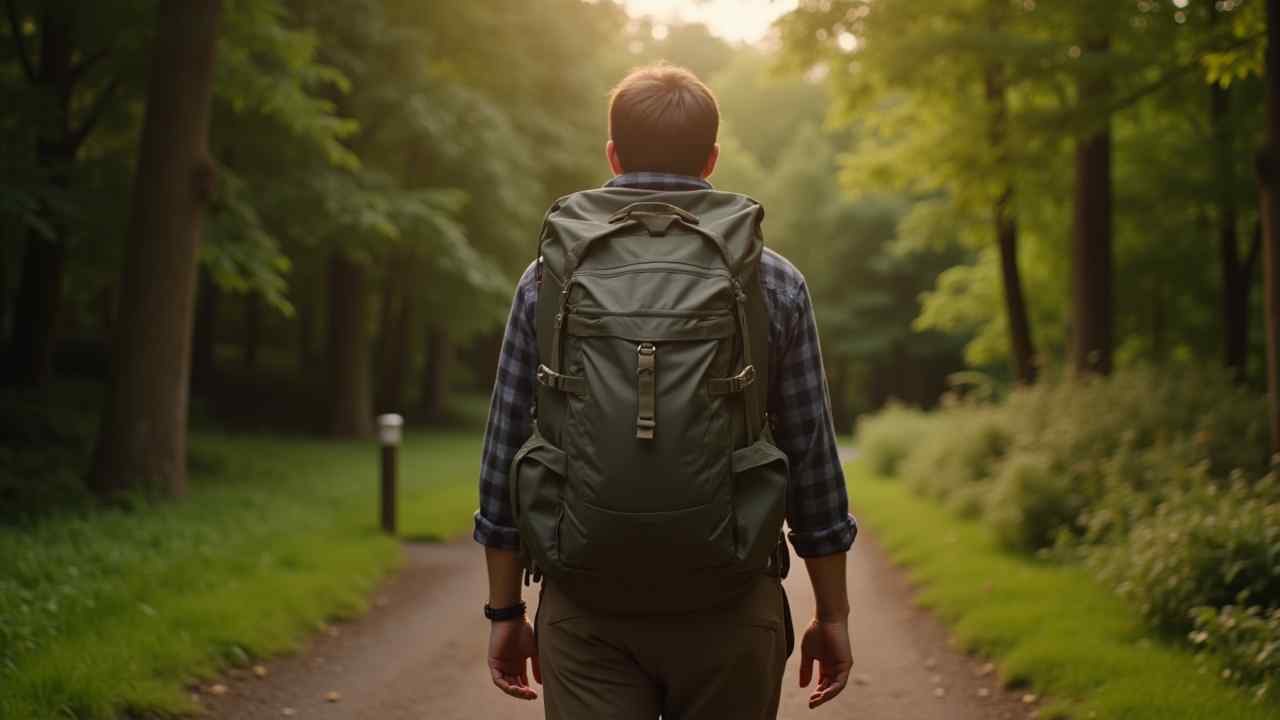
This is a very simple, very popular workout. It is exactly what it sounds like. You put weights in a backpack. And you go for a walk. This is the entire exercise. This is a "functional" fitness movement. It has a real-world application. And it has a real name. The "real" name is "Rucking." 🎒 Where does this name come from? It comes from the military. A "Rucksack" (or "ruck") is a soldier's backpack. A soldier must march with 50-100 lbs of gear. They are "rucking." This military-grade exercise... ...is now a "civilian" fitness trend. Why? Because it is the perfect "bridge" exercise. It is not just "cardio." (Like running). ( And it is not just "strength." (Like lifting). ( It is BOTH. It is a "2-for-1" workout. It is Cardio and Strength... ...at the exact same time. This makes it one of the most efficient... ...and effective workouts you can do. This guide will explain the pros. And the very real cons. And how to get started safely.
The 5 Main Benefits (The "Pros")
Why would you do this? It seems "too simple." But the benefits are huge.
Benefit 1: It is LOW-IMPACT (The #1 Pro) ✅
This is the most important benefit. This is the "magic" of rucking. It is low-impact. Think about Running. Running is a high-impact sport. Every single step is a small "jump." You are landing on one foot. The "ground reaction force" (the impact)... ...is about 3-4 times your body weight. Every step. This is why runners are always injured. (Shin splints, runner's knee, hip pain). (It shreds your joints over time. Now, think about Rucking (walking with weight). Walking is a low-impact sport. You always have one foot on the ground. You are not "jumping." You are not "pounding." You are "rolling" from heel to toe. This is 100% safe for your knees. And your hips. And your back. (If done right). ( This is the "magic" combo. You get a "running" level workout... ...with a "walking" level of impact. It is the perfect exercise.
Benefit 2: It Torches Calories (Fat Loss) 🔥
This is the #2 benefit. It is a "fat-burning machine." Why? It is simple physics. You are a heavier object. (You + 30 lbs). ( Moving a heavier object... ...requires more work. More work = more energy used. Energy is calories. Rucking (with a 30lb pack)... ...can burn 2 to 3 times the calories... ...as a "normal" walk. In fact, a fast ruck... ...can burn more calories than a slow jog! This is a massive win for weight loss. And it is 100% low-impact. (See Benefit 1). (
Benefit 3: It Builds "Functional" Strength ⚙️
This is the "strength" part of the 2-for-1. This is not "mirror muscle" (like bicep curls). ( This is "functional" strength. It is "real-world" strength. It is "farm strength." It builds your "chassis." Your core. Your foundation. What muscles does it build? Your entire posterior chain. (The "back" of your body). (
- Glutes (Butt): Your glutes are firing on every step. To push the new weight. T
- Hamstrings: (Also working to push). (
- Back (All of it): Your lower back (spinal erectors)... ...and your upper back (traps, lats)... ...must be 100% "on" (braced)... ...to hold the pack stable. T
- Core (Abs): Your abs must be tight. To protect your spine. It is a 60-minute plank. I
- Shoulders (Traps): Your "traps" (shoulder muscles)... ...are what hold the weight. They will get very strong. T
Benefit 4: It Fixes Your Posture (The "Armor") 🛡️
This is a huge, hidden benefit. This is the "anti-desk-job" exercise. We sit all day. We are "hunched" over our phones. ("Tech Neck"). (Our posture is terrible. We are "C-shaped." Rucking fixes this. How? The weight in the pack... ...pulls your shoulders backward. To fight this "pull," your body must adapt. It must stand up straight. You are forced to:
- Pull your shoulders back.
- Lift your chest proud.
- Engage your upper back muscles.
Benefit 5: It is Accessible and Social 🚶♀️
This is the final pro. It is easy. It is not a "gym" sport. You do not need a 100/month membership. You just need a backpack. (A good one). (And some weight. And a sidewalk. You can do it anywhere. In a park. In your city. On a trail. And you can talk while you do it. It is not a "gasping-for-air" run. It is a brisk walk. So you can do it with a friend. You can make it a social event. This is a huge "adherence" benefit.
The DANGERS: The 3 "Cons" & Risks 🚨
This is not a "magic" pill. It is a real workout. And it has real risks... ...if you are stupid. If you have a big ego.
Danger 1: "Too Much, Too Soon" (The #1 Mistake) 🚫
This is the #1 danger. Ego is the enemy. You read this article. You get excited. You think, "I am not a rookie!" "I am going to load up 50 lbs! "And walk 10 miles!" You will injure yourself. 100% guaranteed. Your muscles might be strong. But your tendons, ligaments, and joints... ...are NOT. They take months to adapt. They must be "hardened." If you add too much load, too soon... ...you will get:
- Stress fractures (in your shins/feet)
- Knee pain (Tendonitis)
- Ankle sprains
- Lower back pain
Danger 2: The "Wrong" Backpack (The "Sloppy Pack")
This is the #2 danger. You cannot use a cheap, school bookbag. (Like a "Jansport"). ( Why? Those bags are not "structured." They are just a "cloth sack." A "sloppy" pack is a disaster. If the weight is not secure... ...it will bounce and slam on your back. As you walk. It will also "swing" from side-to-side. This is extremely dangerous for your spine. It will cause "shear force" on your back. It will cause shoulder and neck pain. This is a safety risk. You need a good bag.
Danger 3: Bad Form (The "Hunch") 🐢
This is the final risk. If the pack is too heavy... ...you will "hunch" forward to compensate. You will "turtle." This "hunched" form... ...takes the load off your strong upper back... ...and puts 100% of the stress... ...on your lower back (your lumbar spine). This is a recipe for a "herniated disc." A or a "bulging disc." This is a serious injury. The goal is "proud chest." If you cannot keep your chest up... ...the weight is too heavy. Period. Take some out.
The "Gear": What Do You Need?
This is the "how-to" part. What do you need? Only 2-3 things. But they must be good.
1. The Backpack (The "Ruck") 🎒
The bag is the most important tool. It must be a good bag. A cheap school bag will fail. The straps will rip. The zipper will break. And it will injure you. Do not use one. A "Good" Ruck has 4 things:
- Padded Shoulder Straps: They must be wide and thick. (This is where all the weight sits). (
- A Sturdy Back Panel: (An "internal frame"). (This keeps the bag "rigid." It protects your back. I
- A Sternum Strap: This is a 100% non-negotiable strap. It goes across your chest. It pulls the shoulder straps "in." It is a "lifesaver" for your shoulders. I
- A Hip Belt: For loads over 30 lbs, this is also key. A good hip belt... ...transfers the weight from your shoulders... ...to your hips. (Your strong legs). (
- GORUCK: This is the "king" of rucking. They are designed for this. They are bomb-proof. (And very expensive). (
- Military Surplus: A great, cheap option. (An "ALICE" pack). (
- Good Hiking Packs: (Osprey, Gregory, etc.). (These are good. But they are not built... ...for "hard, dense" weight. They can rip. Be careful. B
2. The "Weights" (The "Load") 🧱
This is the main subject. What do you put in the bag? You have "bad," "good," and "best" options. The "Bad" Option (Bouncy!) 🚫
- Dumbbells or Kettlebells: This is a bad idea. They are "lumpy." They are "odd-shaped." They will dig into your back. They will "shift" and "swing" as you walk. This is unstable. And unsafe. A
- Bricks! 🧱 This is the classic "DIY" hack. Get 2-3 house bricks. (6-8 lbs each). (Wrap them in a towel. (Or duct tape). (This is a cheap, stable "block" of weight. I
- Bag of Rice / Sand: A 20lb bag of rice. This is also a good, cheap option. (But it can "shift"). (
- "Ruck Plates" (or "Ruck Weights"): This is the 10/10 solution. These are designed for this. They are thin, flat, rectangular steel plates. (10, 20, 30 lbs). (
How to Start (The "Smart" Plan) 💡
This is the "how-to" for beginners. Follow this plan. Do not get injured.
Step 1: Start with WALKING.
Do not try to "ruck" yet. Just walk. (For 1-2 weeks). ( Walk 30-45 minutes. Get your "walking" base first. Get good shoes. Let your feet adapt.
Step 2: Start LIGHT. (Ego is the Enemy).
Your first weight should be 10-20 pounds. (Or 10% of your body weight). ( A 20 lb weight is plenty. I promise. It is a 10/10 workout. Do not start with 45 lbs. Do not be a hero.
Step 3: Start SHORT. (Distance).
Your first ruck (with weight)... ...should be 1 to 2 miles. That is it. Do not try 10 miles. Your shoulders will be raw from the straps. Your feet will have blisters. Let your body adapt. Adaptation is slow. Respect the process.
Step 4: The "Progressive Overload" Plan. 📈
This is how you get strong. You must "progress." But you must be smart. The Rule: Only change ONE variable at a time. (Weight, Distance, or Speed). ( Example: You are at "20 lbs for 2 miles." You want to "progress." You have two choices. Choice 1 (Add Distance): Ruck "20 lbs for 3 miles." (The weight is the same). ( Choice 2 (Add Weight): Ruck "25 lbs for 2 miles." (The distance is the same). ( Do not try "25 lbs for 3 miles." That is too big of a jump. This is the safe, "injury-free" way to get stronger.
Conclusion: The Ultimate 2-for-1 Workout
Rucking (walking with weights in a backpack)... ...is the ultimate "2-for-1" workout. It is low-impact cardio (for fat loss). And it is functional strength (for muscle). At the same time. It is simple. It is accessible. And it is brutally effective. The 3 Golden Rules: 1. Be smart. Start LIGHT (10-20 lbs). And Start SHORT (1-2 miles). Ego is your enemy. 2. Get the right gear. Use a good backpack (with a sternum strap). Do not use a cheap school bag. 3. Get the right weight. Do not use "bouncy" dumbbells. Use "Ruck Plates." (Or a "towel-wrapped brick"). (The weight must be high and stable. This is the plan. It is a fantastic, life-changing workout. Go for a walk. 🌟