Kettle Weight Squats: The Guide 🏋️
What are Kettle Weight Squats?
A kettle weight squat is a powerful exercise. It is also called a "kettlebell squat." A kettlebell (or "kettle weight") is a special tool. It is a ball of cast iron with a handle. Its shape is its magic. The handle's center of gravity is unique. It is different from a dumbbell. This makes the exercise harder. And it makes it more effective. A kettle weight squat is not just a leg exercise. It is a full-body movement. It tests your core. It tests your back. It tests your grip. It is one of the most functional exercises you can do. It is a true, all-in-one "power" move.
Why Squat with a Kettlebell? (The Benefits)
Why use a kettle weight? Why not just a barbell? A kettlebell squat has unique benefits.
Benefit 1: It Fixes Your Squat Form 🏆
This is the #1 benefit. It is a "squat teacher." The best squat you can do is the "Goblet Squat." (We will cover this next). ( You hold the weight in front of your chest. This is a counterbalance. This counterbalance makes it easy to sit back. It stops you from falling over. It lets you sink your hips down. Low, between your heels. It is the fastest way to learn a deep, perfect squat.
Benefit 2: Insane Core Engagement 🔥
This is the "anterior load." The weight is in front of you. Your body must fight to stay upright. It cannot just "rest" the weight on your back. (Like a barbell). ( This forces your entire core to engage. Your abs, your obliques, your deep stabilizers. They must all turn on. They must fire 100%. A kettlebell squat is an ab exercise... ...disguised as a leg exercise. It is amazing for your core.
Benefit 3: Full-Body Functional Strength
This is not an "isolation" exercise. It is an "integration" exercise. It works:
- Your Legs: (Quads, Glutes, Hamstrings) 🦵
- Your Core: (Abs, Back)
- Your Upper Back & Shoulders: (You must hold the bell up)
- Your Arms & Grip: (Your forearms will be on fire)
Benefit 4: It is Safe and Scalable
This is a very safe exercise. If you "fail" a rep... ...what happens? You just drop the bell on the floor. That is it. You are not trapped under a heavy barbell. This makes it perfect for beginners. And for home workouts. It is also "scalable." A 10-pound bell is a great start. A 100-pound bell is a serious challenge. You can always progress.
The #1 Type: The Goblet Squat (The King) 👑
This is the first kettle weight squat you must learn. It is the foundation for everything. It is the "king" of all squat variations. It was invented by the legendary coach Dan John. He invented it to teach the squat. As a "goblet." You hold one kettlebell. You hold it with both hands. You hold it vertically. Like you are holding a "goblet" or "cup." 🏆 You hold it right at your chest. The bell is up. The handle is down. You "cup" the bell. Or, you can hold the "horns" of the handle. (The vertical parts). ( This is the safest, most effective squat. It is the one we will teach you now.
How to Do a Perfect Goblet Squat (Step-by-Step)
Form is everything. Do not rush this. Learn the movement.
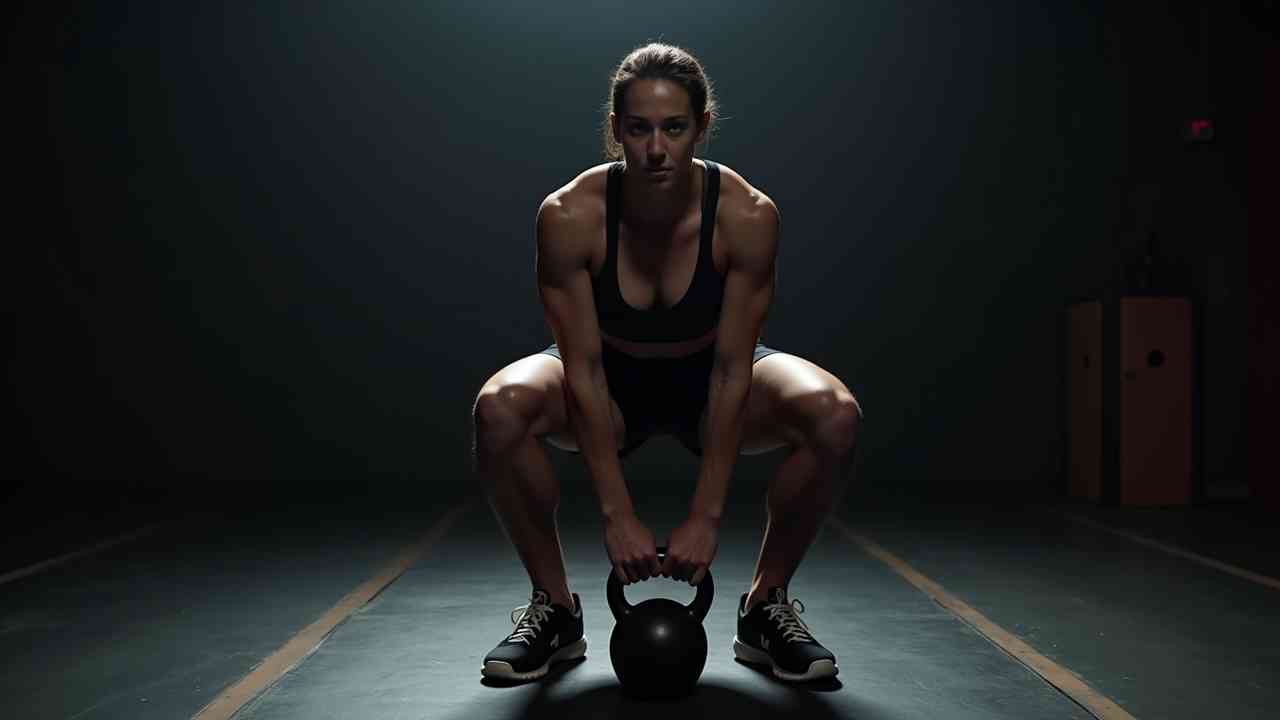
Step 1: The "Hike Pass" (The Start)
Do not "deadlift" the bell up with a round back. That is dangerous. Stand over the bell. Feet are shoulder-width. Hinge at your hips. Keep your back flat. Grab the handle. "Hike" the bell back. (Like a football snap). ( Use that "hike" momentum... ...to "pop" your hips. And "float" the bell up to your chest. This is a safe "clean."
Step 2: The Grip (The "Horns")
You have the bell. Now, get the right grip. Hold the bell by the "horns." This is the vertical part of the handle. Your palms should face each other. Your hands are on the sides of the handle. Not the top. Flip the bell up. The handle is down. The iron ball is up. The bell should be glued to your chest. Close to your sternum.
Step 3: The Stance
Set your feet. They should be just outside your shoulders. Point your toes slightly out. (About 5-15 degrees). ( This "opens up" your hips. It creates space for your body.
Step 4: The Brace (The "Armor")
This is a secret of all strength. Brace your core. Take a big, deep breath into your belly. Not your chest. Now, tighten your abs. As if you are about to be punched. This is your "body armor." It makes your core solid. Hold this brace.
Step 5: The Descent (The "Sit")
Now, you squat. The movement is simple. You are sitting down. You are not "bending over." Initiate the move by breaking at the hips and knees. At the same time. The goal is to sit between your legs. Not "on top" of your legs. Keep your chest up. Keep your back straight. The bell must stay on your chest. Do not let it drift forward.
Step 6: The "Magic Cue" (Elbows & Knees) ✨
This is the magic part of the Goblet Squat. As you squat down... ...you must aim your elbows... ...for the inside of your knees. This is the cue. "Elbows inside knees." This does two things: 1. It forces your knees out. (This is safe and strong). (2. It forces your chest up. (You cannot round your back). ( It is a self-correcting movement. It is brilliant.
Step 7: The Depth (The "Bottom")
Go as low as you can. Go as low as your mobility allows. With a flat back. The goal is "ass-to-grass". Your hamstrings should touch your calves. Your hips should be lower than your knees. T At the bottom, pause for one second. Your elbows should be gently pushing your knees out. Your back should be arrow-straight. This is a perfect, deep squat.
Step 8: The Ascent (The "Stand")
Now, stand up. Lead with your chest, not your butt. Keep your chest up. Drive through your heels. Push the floor away from you. As you stand, squeeze your glutes (your butt). Squeeze them hard at the top. Lock your hips out. Exhale sharply. ("Tsss!"). ( You are done. That is one perfect rep.
Common Goblet Squat Mistakes (How to Fix Them)
These are the common errors. They are easy to fix.
Mistake 1: The "Turtle Back" (Rounding) 🐢
The Problem: Your upper back rounds over. Your chest drops. You look like a "turtle." Or a "shrimp." The Cause: The bell is too heavy. Or it is drifting away from your chest. Your upper back is not strong enough. The Fix: Use a lighter bell! Ego is the enemy. The Cue: "Show the logo on your shirt." Keep your chest proud. And glue the bell to your sternum. Do not let it move.
Mistake 2: Knees Caving In (Valgus Collapse) inward
The Problem: As you stand up, your knees "buckle" or "cave" inward. They point at each other. This is very dangerous for your knee joints. The Cause: Your glutes (butt muscles) are weak. Or they are not "turned on." The Fix: The Goblet Squat already has the fix! The "elbows-inside-knees" cue. The Cue: "Spread the floor." Imagine you are trying to "rip" the floor apart... ...with your feet. This will fire your glutes. And it will push your knees out. Safe.
Mistake 3: Heels Lifting Up 👠
The Problem: As you squat down, your heels lift off the floor. You are on your toes. This is unstable. And it is bad for your knees. The Cause: This is usually a mobility problem. Your ankles are too tight. (This is very common). ( The Fix (Temporary): Elevate your heels. Get two small (5 lb) weight plates. Put your heels on them. This is a temporary "cheat." It will let you squat deep. The Fix (Permanent): Work on your ankle mobility. Stretch your calves! Every day. The Cue: "Wiggle your toes." At the bottom of the squat, wiggle your toes. This forces you to put your weight on your heels.
Other Types of Kettlebell Squats
The Goblet Squat is your foundation. Once you master it, you can evolve.
1. The Double-Kettlebell Front Squat
This is the next step up. It is a true strength-builder. It is much, much harder. You need two kettlebells. (Of the same weight). ( You "clean" them up to your shoulders. You hold them in the "rack position." The bells rest on your chest and arms. This is a heavy, front-loaded squat. It is a core-shredding exercise.
2. The Sumo Squat
This is a different stance. You take a very wide stance. (Wider than your shoulders). ( Your toes point out at 45 degrees. You hold one heavy bell. You hold it by the top handle (the "grip"). The bell hangs down between your legs. You squat down. Keep your chest up. The bell taps the floor. Then you stand up. This variation targets your inner thighs (adductors). And your glutes more. It is a great "hip" exercise.
3. The Overhead Squat
This is not a "muscle" exercise. This is an advanced mobility exercise. Do not try this until you are an expert. It is very difficult. You press one, light kettlebell... ...straight up over your head. Your arm is locked out. Now... ...you perform a full, deep squat... ...while keeping that arm locked overhead. And your eyes forward. This requires amazing shoulder mobility. And thoracic (spine) mobility. And hip mobility. It is a "diagnostic" tool. It will show you where you are weak.
Kettlebell Squat vs. Barbell Squat
Which one is better? This is a common question. The answer is: They are different tools. You need both. The Barbell Squat (The King of Load) A barbell squat is for maximum strength. You can put 300, 400, 500+ pounds on your back. You cannot hold a 400-pound kettlebell. The barbell is the king for building raw leg strength. And size. The Kettlebell Squat (The King of Movement) The kettlebell squat is for core strength. And movement quality. And mobility. The Goblet Squat teaches you the pattern of a perfect squat. It is the "teacher." The Perfect Plan: Use the Goblet Squat to learn the form. Use it as your "warm-up" exercise. Use it to build your core. Then, use the Barbell Squat to get strong. Use the form the kettlebell taught you. They are not enemies. They are partners. They work together.
Conclusion: The Ultimate Functional Exercise
The kettle weight squat is a top-tier exercise. It is a true "bang-for-your-buck" movement. It is not just a "leg day" exercise. It is a "full body" exercise. The Goblet Squat is your new best friend. It is a tool. It is a teacher. And it is a core-builder. It will fix your form. It will build your abs. It will improve your mobility. And it will build strong, powerful, functional legs. Master this one movement. It will change how you train forever.