🧪 How to Patch Test Skincare Products (A Simple, Step-by-Step Guide)
🧪 How to Patch Test Skincare Products (A Simple Guide to Avoid Disaster) 🧪
You have just bought a new, exciting skincare product. You cannot wait to slather it on and see the amazing results. But before you do, there is one simple, non-negotiable step you must take: the patch test. This is the golden rule of smart skincare.
So, how do you patch test skincare products? It is an incredibly simple procedure. It takes just a minute to do. It is the best way to prevent a potential full-face disaster, like an allergic reaction, a painful rash, or a major breakout. It is a crucial habit for everyone to adopt.
This guide will walk you through the easy, step-by-step process. Let's make this simple safety check a standard part of your routine. Your skin will thank you! ✅
🤔 Why is Patch Testing So Important?
A patch test is a safety precaution. It is a way of testing a new product on a small, discreet area of your skin. This is to see how your skin will react before you apply it to your entire face. Even if a product is labeled "hypoallergenic" or "for sensitive skin," you can still have an individual reaction to an ingredient.
This is especially important for people with sensitive skin or a history of allergies. It is also crucial when you are introducing a product with strong "active" ingredients. This includes retinoids, Vitamin C serums, and exfoliating acids (AHAs/BHAs). The changing, cooler autumn weather here in Bursa can also make skin more reactive, making this a perfect time to be extra cautious. 🍂
- How Do You Perform a Patch Test Correctly? (The 4 Steps)
Performing a patch test is quick and easy. Follow these four simple steps for any new product you are adding to your routine. This is the standard procedure for how to patch test skincare products.
Step 1: Choose a Discreet Test Spot
Select a small, hidden area of skin. The goal is to test the product without it being noticeable if you do have a reaction. The two best spots are:
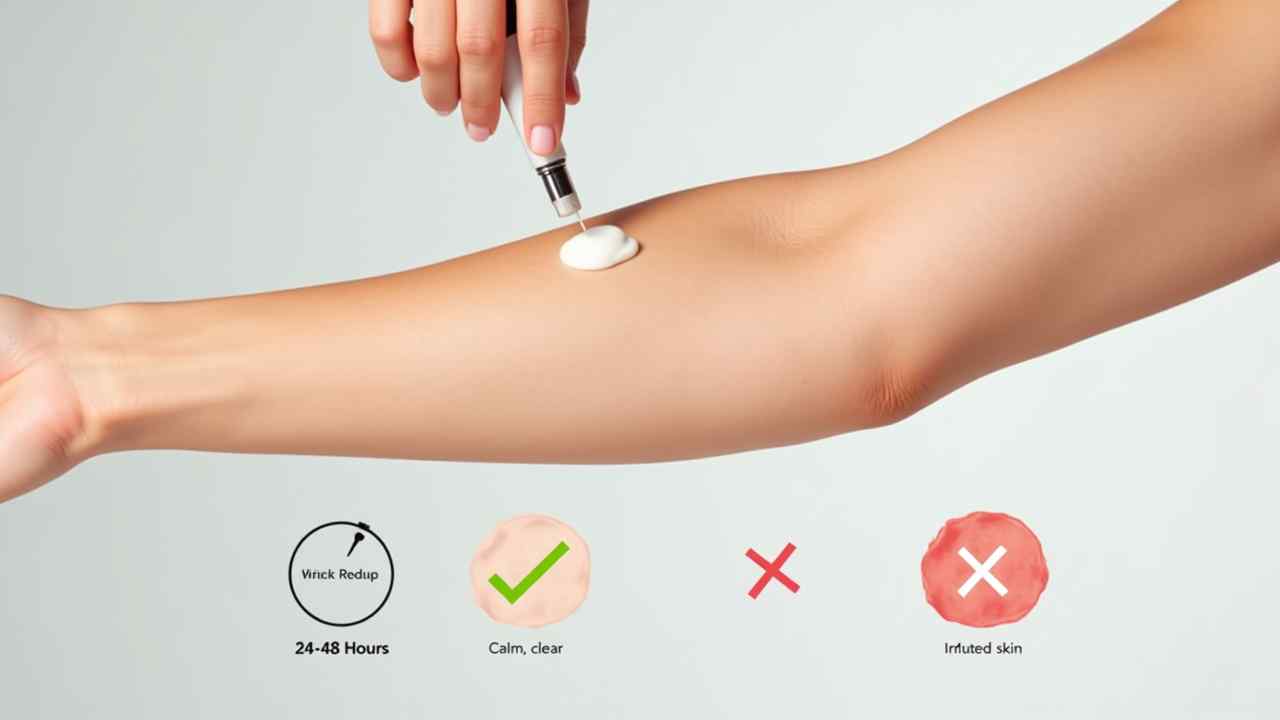
- The inner forearm
- The area just behind your ear
These spots are sensitive enough to be a good indicator, but they are also easily hidden.
Step 2: Apply a Small Amount of the Product
On a clean, dry patch of skin in your chosen area, apply a small, dime-sized amount of the new product. Gently rub it in, just as you would if you were using it normally. Let it dry.
Step 3: Wait and Observe (The Hardest Part!)
Now, you must wait. For a simple product like a moisturizer, the standard waiting period is 24 to 48 hours. Do not wash the area during this time if possible. For a product with strong active ingredients, it is a good idea to apply it to the same spot once a day for up to a week. This is to check for delayed sensitivity.
Step 4: Check for Any Signs of a Reaction
After the waiting period, carefully examine the test spot. You are looking for any signs of irritation. If you see any of the following, the product has failed the test:
- Redness
- Itching
- Swelling
- Small bumps or a rash
- Any other form of irritation
If you experience any of these symptoms, wash the area immediately and do not use the product on your face. If the test spot is completely clear, calm, and normal, congratulations! The product is likely safe for you to use. ✨