How to Clean a Sleeping Bag 🧼
Why Clean Your Sleeping Bag?
Your sleeping bag looks dirty. 🏕️ It feels a little grimy. It smells like campfire and sweat. Worst of all, it has lost its "puff." It looks flat. This is a serious problem. A dirty bag is a cold bag. 🥶 Over time, your body oils and dirt get into the insulation. They make the delicate fibers (or down feathers) clump together. Clumped insulation cannot trap air. If it cannot trap air, it cannot keep you warm. Its "loft" is gone. Cleaning your sleeping bag is essential. It restores the loft. It makes the bag warm again. But you must be very, very careful. You can easily destroy your bag. Washing a sleeping bag is a delicate operation. This is especially true for down bags. This guide will show you the safe way. The professional way. To get your bag clean and fluffy. ✨
The #1 Rule: Down vs. Synthetic 🚫
This is the most important rule. Know your fill type. You must know what is inside your bag. Is it a Down Bag (filled with goose or duck feathers)? 🦢 Or is it a Synthetic Bag (filled with polyester fibers)? 🧪 Check the tag. Check the manufacturer's website. You must know. Why does this matter? The cleaning methods are completely different. If you wash a down bag like a synthetic bag... ...you will destroy it. You will create a lumpy, useless mess. This is a high-stakes laundry day. Do not guess. Know your fill.
The 4 Golden Rules (NEVER Do This!)
Before we start, here is the "NEVER" list. These four things will destroy your bag. Avoid them at all costs.
1. NEVER Use a Top-Loading Washer 🚫
A top-loading washer is the one with an "agitator." That is the tall spindle in the middle. That agitator is a monster. It is a "sleeping bag killer." It will grab your bag. It will tear the delicate, lightweight shell. It will rip the internal baffles (the seams). It will destroy your bag in 5 minutes. You MUST use a Front-Loading Washer. The kind you see at a laundromat. A front-loader has no agitator. It just tumbles the bag. It is gentle. This is the only safe way. No exceptions.
2. NEVER Use Fabric Softener 🚫
Fabric softener is a waxy, oily coating. It is designed to coat fibers. It feels soft. This coating will destroy your insulation. It will make down clump forever. It will make the fine synthetic fibers slick and useless. Your bag will never be warm again. It will be ruined. Also, do not use bleach. Do not use "pods" (the soap is too concentrated).
3. NEVER Dry Clean 🚫
This sounds like a good idea. "It's a fancy item. Let the pros handle it." WRONG. Dry cleaning uses harsh, industrial solvents. These chemicals will strip the natural oils... ...from the delicate down feathers. The feathers will become brittle. They will break. They will turn to dust. Do not dry clean.
4. NEVER Use Your Home Dryer (Probably) 🚫
Your home dryer is likely too small. And it is probably too hot. A 0-degree bag is huge. It needs space to tumble and fluff up. If it is cramped, it will not dry. The insulation will stay clumped in the corners. Also, home dryers get too hot. The high heat setting can melt the nylon shell. 🔥 You will melt a hole in your 400 bag. You need a large, commercial dryer. The kind at the laundromat. And you must use the LOW HEAT setting.
How to Wash a SYNTHETIC Sleeping Bag (The Easy One) 🧼
This is the easy one. You can relax. Synthetic insulation (like polyester) is tough. It is durable. It can handle a gentle wash.
Step 1: Prep the Bag
First, prep your bag for the wash. Zip up all the zippers. Zip the main zipper. Zip any pocket zippers. Cinch the hood cords. This prevents snagging. Do not wash it inside its stuff sack. Wash it loose.
Step 2: Machine Washing (Front-Loader)
Take your bag to the laundromat. Get a large, front-loading machine. Put the bag in the machine. Do not overload it. One bag per machine is best. You need a special soap. You cannot use regular Tide or All. Why? Those are "detergents." They are too harsh. They will strip the DWR coating. (Durable Water Repellent). ( You must use a technical cleaner. A "soap." Look for brands like Nikwax Tech Wash. Or Granger's Performance Wash. These are sold at outdoor stores (like REI). They are gentle. They clean the bag and protect the fabrics. The Settings: 1. Add the proper amount of Nikwax or Granger's. (Follow the bottle). ( 2. Set the machine to the Gentle / Delicate cycle. 3. Set the water to Warm. (Not hot, not cold). 4. Important: Add an Extra Rinse Cycle. You must get all the soap out. Soap residue will make the fibers sticky. Rinse, rinse, rinse.
Step 3: Drying the Synthetic Bag
This part is also simple. Carefully move the wet bag to the dryer. It will be heavy. Support its weight. Do not just pull it by one seam. You could rip it. Place it in a large, commercial dryer. Turn the heat to LOW HEAT ONLY. Low and slow is the rule. Do not use high heat. You will melt the nylon shell. Run the dryer. It may take 1-2 hours. Check it every 30 minutes. Feel for any damp clumps. It is done when it is 100% dry. And 100% fluffy. Perfect.
How to Wash a DOWN Sleeping Bag (The Hard One) 🦢
This is the scary one. Do not do this for fun. Do not wash your down bag often. (Maybe once every 5-10 years). ( This is a serious, half-day project. You must be patient. You must be gentle. Down feathers are very delicate. Wet down is a nightmare. It clumps into a useless, heavy, gray mess. It looks like lumpy oatmeal. You will think you have ruined your bag. You have not. Do not panic. You can fix it. But you must follow the rules.
Step 1: Get the Right Soap
You cannot use regular soap. You cannot even use "Tech Wash." You must buy a specialized down soap. This is non-negotiable. Look for Nikwax Down Wash Direct. Or Granger's Down Wash. This soap is special. It cleans the down feathers gently. It does not strip their natural, water-repellent oils. It actually restores the loft.
Step 2: Choose Your Wash Method
You have two choices. Machine or Hand.
Method A: Machine Washing (Front-Loader)
This is the fast way. It is also the riskiest. A thin, ultralight bag can rip. If you do it, use the laundromat. Use a front-loading machine. Use the Gentle / Delicate cycle. Use Lukewarm Water. Add the Nikwax Down Wash. Follow the bottle's instructions. You MUST select the EXTRA RINSE cycle. Twice is even better. Soap residue will destroy your down. Get it all out.
Method B: Hand Washing (Safest Method) 🛁
This is the safest, most gentle method. It is a lot of work. But it guarantees no rips. You will need a bathtub. Fill the tub with 4-6 inches of lukewarm water. (Not hot!). ( Add the correct amount of Down Wash soap. Stir it in. Place your un-zipped bag in the water. Gently press it down. Submerge it. DO NOT LIFT IT. Wet down is heavy. You will rip the seams. Gently knead the bag. Like you are kneading bread. Push the soapy water through the insulation. Do this for 10-15 minutes. The water will turn brown. This is the dirt and oils. It is working. Now, drain the tub. The bag will be a heavy, sad, gray lump. Do not panic. Gently press out the excess water. Do not wring or twist it. Refill the tub with clean, cool water. This is the rinse. Gently knead the bag again. You are pushing the soap out. Drain the tub. You must repeat this. You must rinse 3, 4, or 5 times. Rinse until the water is 100% clear. And there are zero soap bubbles. This is the most important, and most boring, part. Get all the soap out.
The Most Important Part: How to DRY a Down Bag 🔥
This is it. This is the step that matters. This is where you save or destroy your 400 bag. You cannot mess this up. You just washed your bag. It is a 40-pound, soaking wet, gray, lumpy disaster. It looks ruined. It is not. We will fix it.
Step 1: The First Squeeze (No Wringing!)
Your bag is in the tub (or washer). It is too heavy to lift. If you lift it, all the seams will rip. The weight of the wet down will tear the bag. You must remove the water first. Fold the bag in half. Gently press down. Press the water out. DO NOT WRING IT. DO NOT TWIST IT. 🚫 This breaks the delicate down feathers. Just press. Squeeze. Roll the bag up like a "burrito." Squeeze. Get as much water out as you can. It will still be very heavy.
Step 2: The Careful Transfer
Now, you must move it. Get a large plastic laundry basket. Or a large trash bag. Scoop the entire bag up from underneath. Support its whole weight. Do not let it hang or droop. Place the heavy, wet lump in the basket. Carry the basket to the laundromat.
Step 3: The Commercial Dryer (The ONLY Way) 🔥
You MUST use a large or extra-large commercial dryer. You need space. Down needs room to tumble and "re-fluff." A home dryer is too small. It is a "clump-maker." Set the heat to LOW HEAT ONLY. Low. Always low. I repeat: LOW HEAT. High heat will melt the nylon shell. It will scorch the down. You will have a 400 pile of melted plastic and burnt feathers.
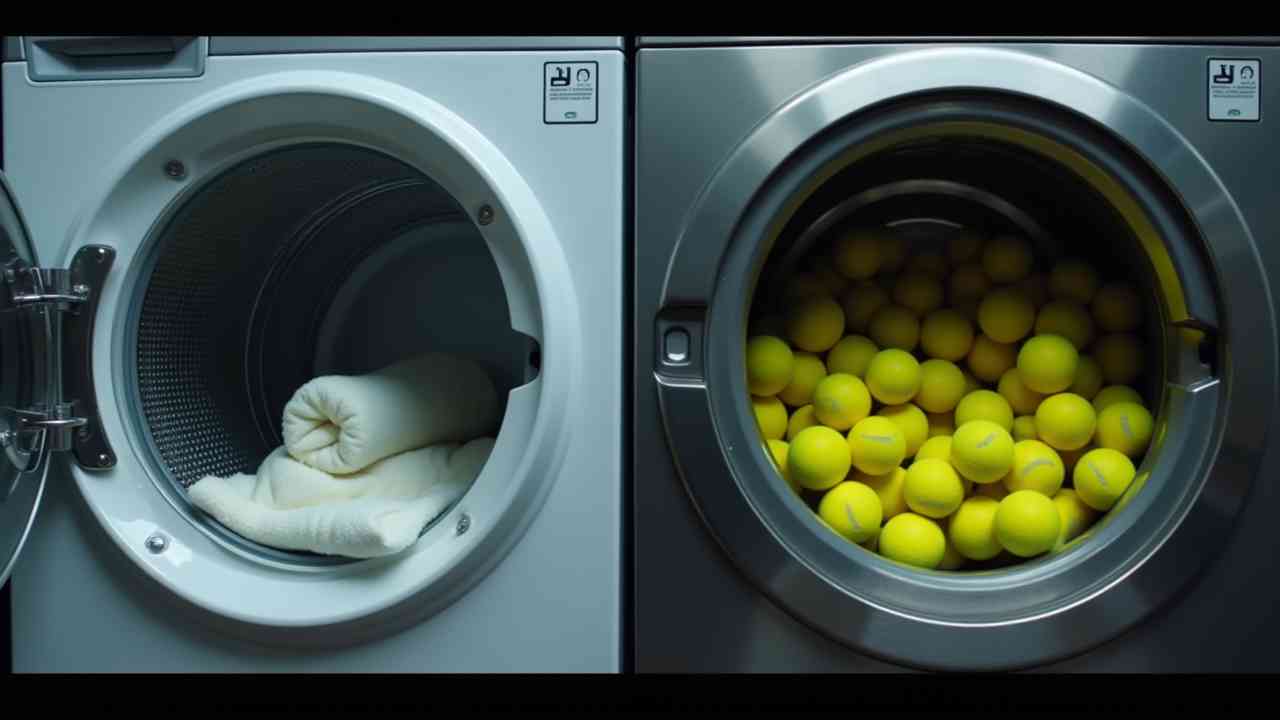
Step 4: The "Tennis Ball" Hack 🎾
This is the magic secret. This is how you break up the clumps. Get 3-5 clean tennis balls. (Or buy specific wool "dryer balls"). ( Throw the tennis balls into the dryer with the wet bag. Now, start the dryer. The dryer will be VERY LOUD. (WHOMP-WHOMP-WHOMP-CLACK). ( People in the laundromat will stare at you. Let them stare. This is the sound of your bag being saved. The balls are "punching" the bag. They are physically breaking up the wet, gray clumps of down. They are forcing air into them. This is what restores the loft. This is the "re-fluffing" process. You cannot dry a down bag without this.
Step 5: Be Patient (The 3-Hour Rule) ⏳
This is the final rule. Be patient. A 0-degree down bag is huge. It will take a long, long time to dry. Expect 2 to 4 hours in the dryer. (Yes, really). (You will need a lot of quarters. Every 30 minutes, stop the dryer. Pull the bag out. Feel it. You will find the damp, cold clumps. Use your hands. Gently break them apart. Massage the clumps. Shake the bag out. Put it back in. Start it again. How do you know it is done? You think it is dry. It feels dry on the outside. But it is not. The center of the clumps is still damp. Go for one more full cycle. You must be 1000% sure it is BONE DRY. If even 1% of dampness is left... ...the down will get mildew. It will rot in storage. It will be ruined forever. When in doubt, dry it more. Low and slow. When it is finally done, it will be huge. It will be fluffier than when you first bought it. It will be puffy and new. You have restored the loft. You have saved your bag.
How to "Spot Clean" a Bag (The 5-Minute Fix)
99% of the time, you do not need a full wash. Do not wash your bag unless you have to. Usually, the bag is just a little dirty. You have a mud spot on the shell. You spilled some food. You can spot clean. This is the best method. 1. Get a bowl of warm water. Add a tiny drop of your "Down Wash" or "Tech Wash" soap. 2. Get a clean toothbrush. Or a sponge. 🧽 3. Dip it in the soapy water. 4. Gently scrub only the dirty spot on the shell. Do not soak the insulation. Just scrub the surface fabric. 5. Wipe the soap off. Use a clean, wet cloth. 6. Let it air dry. Hang it up for an hour. It is done. I This is 99% of the cleaning you should do. Do this first. Always. Avoid a full wash if you can.
Conclusion: A Clean Bag is a Warm Bag
A clean, lofty sleeping bag is your lifeline. It is your key to a warm, safe night. B But you must clean it with respect. And with patience. Remember the rules: 1. Know your fill type. (Down vs. Synthetic). ( 2. NEVER use a top-loader. (Laundromat only). ( 3. NEVER use fabric softener or harsh detergent. Use Nikwax or Granger's. 4. NEVER use high heat in the dryer. Low heat only. 5. For a down bag, the drying is the real work. Use a huge laundromat dryer. Use low heat. And use tennis balls*. 🎾 6. Be patient. (2-4 hours to dry). (It must be 100% bone dry. This process is a chore. But it will restore your bag. It will make it fluffier and warmer. It will protect your investment for years to come. 🌟