Cream Foundation for Mature Skin 💖
What is a Cream Foundation?
A cream foundation is a specific formula. 💄 It is not a liquid. It is not a powder. It is a rich, emollient-based makeup. It usually comes in a compact. Or a stick. It is made from a blend of oils, waxes, and pigments. This makes it very thick and moisturizing. This makes it a popular choice for mature skin. It promises to add hydration and a "dewy" glow. ✨ However, it is a "high risk, high reward" product. If you apply it correctly, it looks beautiful. If you apply it incorrectly, it can look heavy. It can make you look older. 😫 This guide will show you the right way. The "pro" method.
The "Mature Skin" Makeup Challenge
Why is mature skin so tricky? It has a new set of needs. Your old makeup tricks may not work.
1. Dryness and Dehydration
As we age, our skin produces less oil (sebum). This means our skin's natural "moisture barrier" is weak. Water evaporates easily. The skin becomes dry, flaky, and dehydrated. Makeup clings to these dry patches. It looks cakey. It looks patchy.
2. Fine Lines and Wrinkles
Mature skin has texture. It has fine lines. It has wrinkles from a life well-lived. Foundation loves to settle in these lines. It creates "cracks" in your makeup. This is the #1 fear. It highlights the lines you want to soften. It can make you look older.
3. Loss of "Glow" (Dullness)
Your natural cell turnover slows down. Dead skin cells build up. This build-up makes your skin look dull. It does not reflect light well. We need a routine that adds that youthful, radiant "glow" back to the skin.
Pros & Cons of Cream Foundation (For You)
Is a cream foundation the right choice? Let's look at the facts.
The Pros (Why It's a Great Choice) ✅
1. Extreme Hydration 💧 This is the biggest pro. The formula is emollient. It is packed with oils and waxes. It acts like a moisturizer and foundation in one. It is perfect for very dry skin. It feels comfortable. It is not "tight" or "drying." 2. The Dewy, Radiant Finish ✨ Cream formulas give a "glowy" finish. They give a "satin" or "luminous" look. This radiance reflects light. It makes skin look healthier. It makes it look plump. It is the opposite of a dull, matte look. 3. Great Coverage 🎨 Cream formulas are often highly pigmented. They are great at covering redness. They can cover age spots (hyperpigmentation). A little bit goes a very long way.
The Cons (The Danger Zone) 🚫
1. The "Caking" Risk 🎭 This is the big one. Because the formula is thick... ...it is very easy to apply too much. Too much cream foundation looks heavy. It looks like a thick, waxy mask. It looks like "stage makeup." This is very aging and unflattering. 2. The "Settling" Risk 😖 This is the #1 fear. Because it is so emollient, it never fully "dries." It stays "movable" on your skin. This means it will move during the day. It will "creep" and "migrate." It will settle into your smile lines. It will settle in your crow's feet. It will settle in your forehead wrinkles. This highlights the very lines you want to hide.
The #1 Rule: Skin Prep is EVERYTHING 🔑
You can not skip this step. Ever. If you put a thick cream foundation... ...on top of dry, flaky, unprepared skin... ...it will look terrible. Guaranteed. Your makeup is only as good as the canvas. We must create a smooth, plump, hydrated canvas. This is the real secret.
Step 1: Gentle Exfoliation (The Smooth-Over)
We must gently remove the flaky, dead skin. Do not use a harsh, gritty scrub. (Like an apricot scrub). (🚫 This is too damaging. It will tear your delicate, mature skin. It will make the barrier worse. You need a gentle chemical exfoliant. Use it at night, 2-3 times a week. An AHA (Alpha Hydroxy Acid) is best for dry skin. Look for Lactic Acid. Lactic acid is very gentle. It is also a hydrator. It "melts" the glue holding dead cells. This reveals smooth, fresh, glowing skin. T
Step 2: The Hydration "Sandwich" (The Plump) 🥪
This is your morning-of hack. Your skin must be plump with water. First, on DAMP skin, apply a Hyaluronic Acid (HA) Serum. 💧 HA is a "water magnet." It can hold 1,000x its weight in water. Applying it to damp skin pulls that water into your skin. This plumps the skin from within. It fills fine lines.
Step 3: The "Barrier" Moisturizer (The Seal & Prime)
After your HA serum, you must moisturize. This is your real "primer." You need a high-quality, rich cream. Look for these ingredients:
- Ceramides: These are your skin's natural "cement." They repair your skin barrier. 🧱
- Peptides: These are "messengers." They signal your skin to build collagen.
- Squalane: A skin-identical oil that is very hydrating.
Step 4: The 10-Minute Wait (The "Secret") ⏰
This is the most important hack for cream foundation. Do NOT apply foundation immediately. Wait! Let your moisturizer and serums sink in. Let them absorb. Wait 5 to 10 minutes. Your skin should feel plump. It should feel slightly "tacky." It should not feel wet or greasy. This "tacky" base is the perfect primer. It will grip the cream foundation. It stops it from sliding around. This is the key to preventing "settling."
How to Apply Cream Foundation (The Technique) 🖌️
You are prepped. You are ready. Now, the application. The tool you use is critical. The wrong tool will create a cakey, streaky mess. T
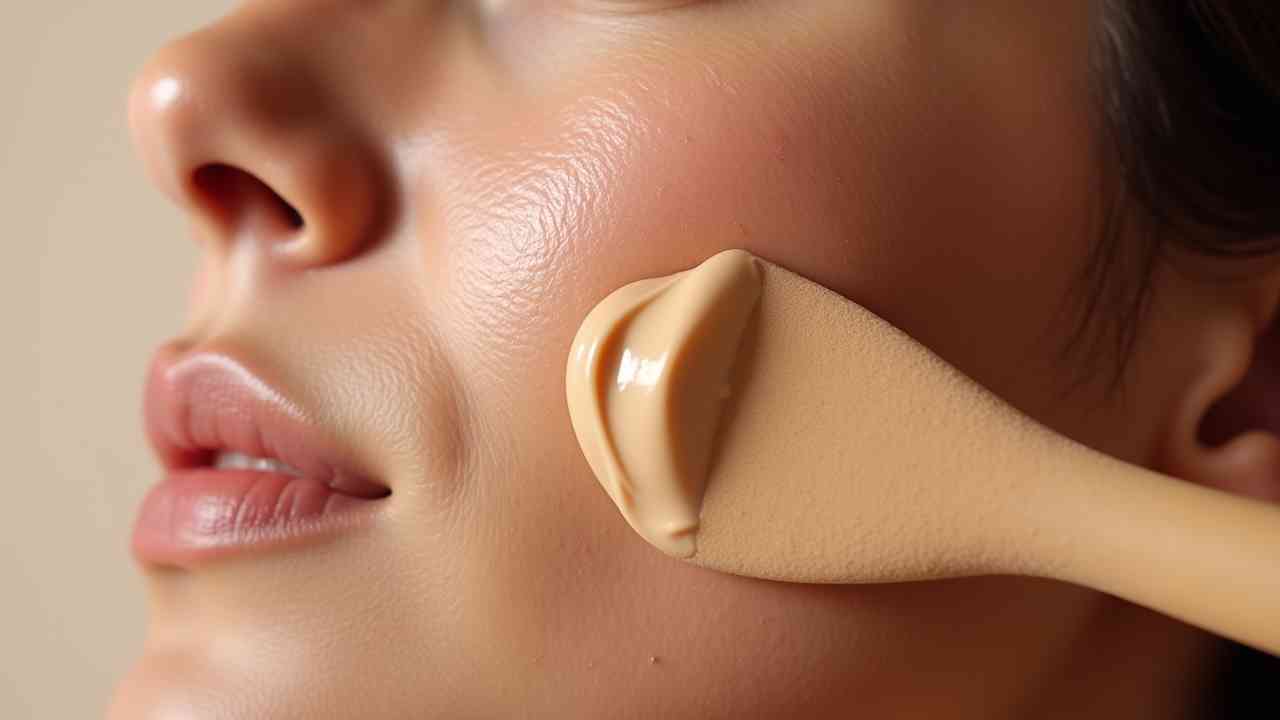
The Best Tool: A Damp Makeup Sponge 🥇
This is the #1 tool for mature skin. Period. (Like a Beautyblender or a similar sponge). ( How to Use It: 1. Get the sponge fully wet. Hold it under the tap until it swells up. 2. Squeeze out all the water. Wrap it in a towel. Squeeze it again. It must be DAMP, not dripping wet. 3. Dab the damp sponge into your cream foundation. Get a tiny amount. Less is more. 4. Apply to your face. Use stippling, bouncing, or tapping motions. (Tap, tap, tap). ( DO NOT WIPE or DRAG. 🚫 Wiping will cause streaks. It will pull your skin. Why This Works: This method is magic for cream formulas. The dampness of the sponge... ...thins out the thick, heavy cream. It makes it sheer. It makes it blend seamlessly. The tapping motion presses the product into your skin. It melts it into your moisturizer. The water in the sponge adds one last layer of hydration. The result is a dewy, flawless, "real-skin" finish. It is the best way to prevent caking.
The Second Best Tool: Your Fingers 👐
This is also a great method. It is free. The natural warmth from your fingers... ...is perfect for a wax- and oil-based cream. It melts the product. It makes it blend beautifully. Use a gentle tapping and pressing motion. Tap. Press. Melt it into your skin. Do not rub or pull.
The Tool to Avoid: A Stiff Foundation Brush 🚫
Be very careful with brushes. A st A stiff, dense "kabuki" brush is often too harsh. It is designed to buff. Buffing a cream foundation on mature, dry skin... ...can "lift up" the dry, flaky patches. It can cause streaks. A brush can make the texture look worse. A damp sponge is much more forgiving. It is much gentler.
The Golden Rules of Application
You have your tool. Here are the rules of the road.
Rule 1: LESS IS MORE. (The #1 Rule)
This is the most important rule of all. Less is more. I repeat: Less is more. You are mature. You are not 20. You cannot wear a "mask" of makeup. You will look older. Use the tiniest amount of cream. A 2-3 "dabs" from your sponge is enough. Start in the center of your face. (e.g., your nose and inner cheeks). (This is where most redness is. Blend the product outward toward your hairline. The coverage should be thinnest at the edges of your face. This looks natural. Do not apply foundation to your whole face. You probably do not need it. Put it only where you need it. (To cover redness, to even tone). (Let your good, healthy skin show through. T
Rule 2: Build in Thin Layers.
Do you have a stubborn age spot? Or dark circles? Do not slather on a thick, heavy layer. This will cake. Instead, build up the coverage. Use a second, paper-thin layer. Tap this layer only on the spot you want to cover. This is a "spot-concealing" technique. It is much more natural.
Rule 3: The Powder Problem (Be CAREFUL!)
Powder is the enemy of mature, dry skin. It is a "glow-killer." It is dry. It is chalky. It soaks up all your moisture. It settles into every single fine line. It makes you look 10 years older. Your New Rule: Do NOT set your whole face. 🙅 You do not need to! You are not oily. You want the dewy glow. That is why you bought a cream foundation. Embrace the glow! ✨ The Fix: You only need powder in one place. The "hot spots" that crease. You need a tiny, fluffy eyeshadow brush. Not a big powder puff. N You need a translucent setting powder. (Not a heavy, pigmented powder). ( Get a tiny amount of powder. Tap off the excess. Gently tap this only where you need it:
- Under your eyes (to set your concealer)
- In your smile lines (nasolabial folds)
- Between your brows (your "11" lines)
What to Look For in a Cream Foundation
Your foundation should be a skincare-makeup hybrid. L Look for these skin-loving ingredients on the label. The "Good" Ingredients List: ✅
- Hyaluronic Acid (Hydrates, plumps)
- Glycerin (Hydrates)
- Squalane (A skin-identical oil, very moisturizing)
- Ceramides (Repairs your skin barrier) 🧱
- Niacinamide (Brightens, calms redness)
- Vitamin E (Moisturizes, antioxidant)
- Peptides (Signals collagen, firms)
- "Matte" or "Oil-Free" (These are for oily skin. They will dry you out.)
- Alcohol (Denat.) (If it is high on the list, it is very drying.)
- Heavy Fragrance / Perfume (Mature skin is often sensitive. Fragrance is a top irritant. F
Conclusion: The 3-Step "P" Method
A cream foundation is a fantastic tool for mature skin. It can restore a youthful, dewy glow. But it is a high-skill product. The secret is not the makeup. The secret is the technique. Just remember the 3 "P's" for success. 1. PREP: You must prep your canvas. Exfoliate (at night). Hydrate (HA on damp skin). Moisturize (with ceramides). And WAIT 10 minutes. This is the most important part. 2. PRESS: Use a damp makeup sponge. Use a tiny amount of product. Press and tap the foundation into your skin. Less is more. 3. POWDER LESS: Do not use powder on your whole face. Embrace the glow. Use a tiny brush. Just set your crease lines. Finish with a hydrating mist.
This is the plan. This is the secret. You will look radiant, plump, and flawless. Not cakey or dry. You will look like you, but better. 🌟